2011年4月20日星期三

Photogenic Drawing Salted Paper 1

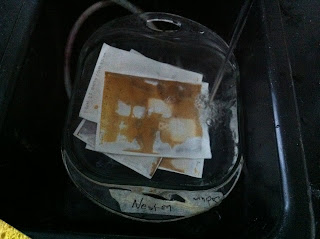
This is the second lab time, the aim of this experment is use salt and silver nitrate to make a solution for making a photogenic drawing. My group decide to make 12 test piece which combine different scale of solution and coats to get the reslut after reaction with the sunlight, then we can find out which combination show the best effect.

What we got in this experment:
1. 2% salt solution
2. 5% salt solution
3. 5% silver nitrate solution
4. 12% silver nitrate solution
5. destill water
6. water color paper

Process

My group provide the 2% salt solution by using 2g salt dissolve in 100 ml destill water. Ang we will get the other soltion provide by other group.

Get done 12 test paper


There are our 12 combination
1. 1 Coated of 2% Salt 1 Coated of 5 % Silver Nitrate
2. 1 Coated of 2% Salt 1 Coated of 12 % Silver Nitrate
3. 2 Coated of 2 % Salt 1 Coated of 5% Silver Nitrate
4. 2 Coated of 2% Salt 1 Coated of 12% Silver Nitrate
5. 2. Coated of 2% Salt 2 Coated of 5% Silver Nitrate
6. 2 Coated of 2% Salt 2 Coated of 12% Silver Nitrate
7. 1 Coated of 5% Salt 1 Coated of 5% Silver Nitrate
8. 1 Coated of 5% Salt 1 Coated of 12% Silver Nitrate
9. 1 Coated of 5% Salt 2 Coated of 5% Silver Nitrate
10. 1 Coated of 5% Salt 2 Coated of 12%  Silver Nitrate
11. 2 Coated of 5% Salt 2 Coated of 5 %  Silver Nitrate
12. 2 Coated of 5% Salt 2 Coated of 12%  Silver Nitrate

We use dropper to drop the solution and use brush to apply the solution vertical and horizantal to get evenly coat, then use hairdryer to dry the paper, if it is needed, we put another coat, also, dry it.


After all 12 pieces are done, we put some items on the paper then go outside to explode 5min. The pics above show the reaction, when the paper get the sunlight dreictly, it's getting dark.


2011年3月26日星期六

Photogenic drawing

Photogenic drawings were invented by William Henry Fox Talbot (1800-1877), a gentleman scientist whose interests included optics, chemistry, botany and art. Talbot had experimented with contact printing from as early as 1834, but it was not until Arago's announcement of Daguerre's discovery that he made public his results. Just as Talbot had picked up where Thomas Wegwood (1771-1805) had left off some thirty years earlier, so Sir John Herschel (1792-1871) continued the work of Talbot, exploring a wide range of materials and processes, most notably those involving fixing in 'hypo'.

Photogenic drawings were prepared by soaking a piece of good quality drawing paper in a weak solution of common salt, allowing this paper to dry, brushing it with a solution of silver nitrate, and then further washing it in a strong solution of common salt. Exposure was usually made by contact printing for as long as it took an image to appear. This image would then be fixed: Talbot used a strong solution of common salt for this or, occasionally, potassium iodide; Herschel's hypo fixer (sodium thiosulphate) dissolved away any remaining silver nitrate more efficiently and subsequently became the standard for all silver processes.

---------------------------------------------------------------------------------------------

Study of an oak leaf by Sir John Herschel (1792-1871), 26th February, 1839, from his hypo fixing experiments.

Apart from the examples of lace this negative photogenic drawing is Herschel's only contact image of a real object, rather than an engraving or other form of illustration.

The mark on the leaf seems to be a large J.


Contact image of heather, Erica mutabilis, made on stiff paper by W. H. Fox Talbot (1800-1877), dated March 1839.


Study of lace, by Sir John Herschel (1791-1871), 1839.


View of the telescope at Slough, by Sir John Herschel (1792-1871), 1839.

At the time that this was taken, Sir William Herschel's 40-foot telescope was already a famous astronomical symbol, although it was being demolished - hence the absence of the telescope's tube.

The only camera images Sir John Herschel is know to have taken are of his father's telescope; they also include the first photograph to be taken on glass (now in the Science Museum, London).


Negative image of an engraving of a lady by Sir John Herschel (1792-1871), 5th August, 1839, fixed with hypo.

Working with anthotypes

According to my gourp's likeness of green and red, we designed an experiment by using spinach, raspberry water and alcohol as our "magic juice", as following, there are six types:

*raspberry x 2 : alcohol x 1
*raspberry x 1 : water x 1
*spinach x 2 : alcohol x 1
*spinach x 1 : water x 1
*(raspberry + spinach) x 2 : alcohol x 1
*(raspberry + spinach) x 1 : water x 1

we applied each of them 3 coats vertically and horizontally on water color paper then cut some shapes to cover ther paper. Next, was hoping for sunny days in Rochester and waiting for the exciting results :)

-----------------------------------------------------------------------------------------------------------


Sadly, after two weeks, there is no distinct change on the paper, my "magic juice"(raspberry x 1 : water x1) dosen't work :( I assume the reason maybe the coat is not so even.

Flowers+Water+Sun=?, ?=Anthotype

----------------------------------------------------------------

----------------------------------------------------------------

----------------------------------------------------------------

Anthotypes are a beautiful way to create fine art images right from your garden. This long neglected process, originally invented by Sir William Herschel in 1842, is simple yet elegant. An emulsion is made from crushed flower petals or any other light-sensitive plant, fruit or vegetable. A coated sheet of paper is then dried, exposed to direct full sun-light until the image is bleached out. This is done ideally in a printing frame over 1-3 days or more depending on conditions and negative/material. What you see is what you get. No fixation is required. You can follow the gradually emerging image as you go. Results vary greatly from plant to plant and the strength of the emulsion employed. The resulting images are exquisite and often almost wispy or dream-like.
The Anthotype process is a beautiful way to make images and is certainly the most environmentally-friendly.

History

The photo-sensitive properties of plants and vegetables have been known to scholars for centuries. Among many early observations the experiments of Henri August Vogel in Paris are of particular interest. He found in 1816:
An alcoholic tincture of either red carnations, violets or corn poppy turned white behind blue glass in a few days, while it remained unchanged behind red glass after about the same time. Cotton and paper colored with these tinctures showed the same differences.
When Herschel later that century attempted to invent a color process, he tried several flower and plant emulsions and published his findings. His research resulted in what we now refer to as the anthotype process. It should be pointed out that his research into making photographic images from flowers was limited and was ultimately abandoned since no commercial application was feasible from a process which takes days to produce an image. The process continued to be listed in photographic literature of the time but was likely little used.
Over time the process has earned a false reputation for being simply too impractical. Image permanence have been brought into question to this day but this problem seems to be mostly related to choice of flower or plant matter.

How it works

From an examination of the researches of Sir John Herschel on the coloring matter of plants, it will be seen that the action of the sun's rays is to destroy the color, effecting a sort of chromatic analysis, in which two distinct elements of color are separated, by destroying the one and leaving the other outstanding. The action is confined within the visible spectrum, and thus a broad distinction is exhibited between the action of the sun's rays on vegetable juices and on argentine compounds, the latter being most sensibly affected by the invisible rays beyond the violet. It may also be observed, that the rays effective in destroying a given tint, are in a great many cases, those whose union produces a color complementary to the tint destroyed, or, at least, one belonging to that class of colors to which such complementary tint may be preferred. For instance, yellows tending towards orange are destroyed with more energy by the blue rays; blues by the red, orange and yellow rays; purples and pinks by yellow and green rays.
- Henry H. Snelling